Input controls are the interactive components in your app's user interface. Android provides a wide variety of controls you can use in your UI, such as buttons, text fields, seek bars, check box, zoom buttons, toggle buttons, and many more.
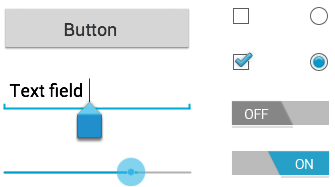
UI ELEMENTS
A View is an object that draws something on the screen that the user can interact with and a ViewGroup is an object that holds other View (and ViewGroup) objects in order to define the layout of the user interface.
You define your layout in an XML file which offers a human-readable structure for the layout, similar to HTML. For example, a simple vertical layout with a text view and a button looks like this −

<?xml version="1.0" encoding="utf-8"?>
<LinearLayout xmlns:android="http://schemas.android.com/apk/res/android"
   android:layout_width="fill_parent"
   android:layout_height="fill_parent"
   android:orientation="vertical" >

   <TextView android:id="@+id/text"
      android:layout_width="wrap_content"
      android:layout_height="wrap_content"
      android:text="I am a TextView" />

   <Button android:id="@+id/button"
      android:layout_width="wrap_content"
      android:layout_height="wrap_content"
      android:text="I am a Button" />
</LinearLayout>
Android UI Controls
There are number of UI controls provided by Android that allow you to build the graphical user interface for your app.
| S.N. | UI Control & Description |
|---|---|
| 1 | TextView
This control is used to display text to the user.
|
| 2 | EditText
EditText is a predefined subclass of TextView that includes rich editing capabilities.
|
| 3 | AutoCompleteTextView
The AutoCompleteTextView is a view that is similar to EditText, except that it shows a list of completion suggestions automatically while the user is typing.
|
| 4 | Button
A push-button that can be pressed, or clicked, by the user to perform an action.
|
| 5 | ImageButton
AbsoluteLayout enables you to specify the exact location of its children.
|
| 6 | CheckBox
An on/off switch that can be toggled by the user. You should use check box when presenting users with a group of selectable options that are not mutually exclusive.
|
| 7 | ToggleButton
An on/off button with a light indicator.
|
| 8 | RadioButton
The RadioButton has two states: either checked or unchecked.
|
| 9 | RadioGroup
A RadioGroup is used to group together one or more RadioButtons.
|
| 10 | ProgressBar
The ProgressBar view provides visual feedback about some ongoing tasks, such as when you are performing a task in the background.
|
| 11 | Spinner
A drop-down list that allows users to select one value from a set.
|
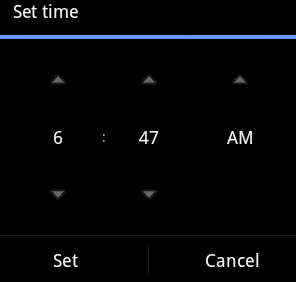
| 12 | TimePicker
The TimePicker view enables users to select a time of the day, in either 24-hour mode or AM/PM mode.
|
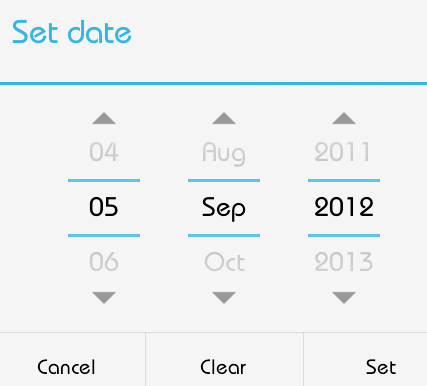
| 13 | DatePicker
The DatePicker view enables users to select a date of the day.
|
Create UI Controls
Input controls are the interactive components in your app's user interface. Android provides a wide variety of controls you can use in your UI, such as buttons, text fields, seek bars, check box, zoom buttons, toggle buttons, and many more.
As explained in previous chapter, a view object may have a unique ID assigned to it which will identify the View uniquely within the tree. The syntax for an ID, inside an XML tag is −
android:id="@+id/text_id"
To create a UI Control/View/Widget you will have to define a view/widget in the layout file and assign it a unique ID as follows −
<?xml version="1.0" encoding="utf-8"?>
<LinearLayout xmlns:android="http://schemas.android.com/apk/res/android"
   android:layout_width="fill_parent"
   android:layout_height="fill_parent"
   android:orientation="vertical" >

   <TextView android:id="@+id/text_id"
      android:layout_width="wrap_content"
      android:layout_height="wrap_content"
      android:text="I am a TextView" />
</LinearLayout>
Then finally create an instance of the Control object and capture it from the layout, use the following −
TextView myText = (TextView) findViewById(R.id.text_id);
Android Time Picker Tutorial
Android Time Picker allows you to select the time of day in either 24 hour or AM/PM mode. The time consists of hours, minutes and clock format. Android provides this functionality through TimePicker class.
In order to use TimePicker class, you have to first define the TimePicker component in your activity.xml. It is define as below −
<TimePicker
   android:id="@+id/timePicker1"
   android:layout_width="wrap_content"
   android:layout_height="wrap_content" />
After that you have to create an object of TimePicker class and get a reference of the above defined xml component. Its syntax is given below.
import android.widget.TimePicker;
private TimePicker timePicker1;
timePicker1 = (TimePicker) findViewById(R.id.timePicker1);
In order to get the time selected by the user on the screen, you will use getCurrentHour() and getCurrentMinute() method of the TimePicker Class. Their syntax is given below.
int hour = timePicker1.getCurrentHour();
int min = timePicker1.getCurrentMinute();
Apart form these methods, there are other methods in the API that gives more control over TimePicker Component. They are listed below.
| Sr.No | Method & description |
|---|---|
| 1 | is24HourView()
This method returns true if this is in 24 hour view else false
|
| 2 | isEnabled()
This method returns the enabled status for this view
|
| 3 | setCurrentHour(Integer currentHour)
This method sets the current hour
|
| 4 | setCurrentMinute(Integer currentMinute)
This method sets the current minute
|
| 5 | setEnabled(boolean enabled)
This method set the enabled state of this view
|
| 6 | setIs24HourView(Boolean is24HourView)
This method set whether in 24 hour or AM/PM mode
|
| 7 | setOnTimeChangedListener(TimePicker.OnTimeChangedListener onTimeChangedListener)
This method Set the callback that indicates the time has been adjusted by the user
|
Example
Here is an example demonstrating the use of TimePicker class. It creates a basic Time Picker application that allows you to set the time using TimePicker Widget
To experiment with this example , you can run this on an actual device or in an emulator.
| Steps | Description |
|---|---|
| 1 | You will use Android studio to create an Android application and name it as TimePicker under a package com.example.timepicker. While creating this project, make sure you Target SDK and Compile With at the latest version of Android SDK to use higher levels of APIs. |
| 2 | Modify src/MainActivity.java file to add necessary code. |
| 3 | Modify the res/layout/activity_main to add respective XML components |
| 4 | Modify the res/values/string.xml to add necessary string components |
| 5 | Run the application and choose a running android device and install the application on it and verify the results |
Following is the content of the modified main activity filesrc/com.example.timepicker/MainActivity.java.
package com.example.timepicker;

import java.util.Calendar;

import android.app.Activity;
import android.os.Bundle;
import android.view.Menu;
import android.view.View;
import android.widget.TextView;
import android.widget.TimePicker;

public class MainActivity extends Activity {
   private TimePicker timePicker1;
   private TextView time;
   private Calendar calendar;
   private String format = "";

   @Override
   protected void onCreate(Bundle savedInstanceState) {
      super.onCreate(savedInstanceState);
      setContentView(R.layout.activity_main);

      timePicker1 = (TimePicker) findViewById(R.id.timePicker1);
      time = (TextView) findViewById(R.id.textView1);
      calendar = Calendar.getInstance();

      int hour = calendar.get(Calendar.HOUR_OF_DAY);
      int min = calendar.get(Calendar.MINUTE);
      showTime(hour, min); // 秀在 TextView 上面

   }

   public void setTime(View view) {
      int hour = timePicker1.getCurrentHour();
      int min = timePicker1.getCurrentMinute();
      showTime(hour, min);
   }

   public void showTime(int hour, int min) {
      if (hour == 0) {
         hour += 12;
         format = "AM";
      }
      else if (hour == 12) {
         format = "PM";
      } else if (hour > 12) {
         hour -= 12;
         format = "PM";
      } else {
         format = "AM";
      }
      time.setText(new StringBuilder().append(hour).append(" : ").append(min)
      .append(" ").append(format));
   }

   @Override
   public boolean onCreateOptionsMenu(Menu menu) {
   // Inflate the menu; this adds items to the action bar if it is present.
      getMenuInflater().inflate(R.menu.main, menu);
      return true;
   }
}
Following is the modified content of the xml res/layout/activity_main.xml.
<RelativeLayout xmlns:android="http://schemas.android.com/apk/res/android"
   xmlns:tools="http://schemas.android.com/tools"
   android:layout_width="match_parent"
   android:layout_height="match_parent"
   android:paddingBottom="@dimen/activity_vertical_margin"
   android:paddingLeft="@dimen/activity_horizontal_margin"
   android:paddingRight="@dimen/activity_horizontal_margin"
   android:paddingTop="@dimen/activity_vertical_margin"
   tools:context=".MainActivity" >

   <TextView
      android:id="@+id/textView2"
      android:layout_width="wrap_content"
      android:layout_height="wrap_content"
      android:layout_alignParentTop="true"
      android:layout_centerHorizontal="true"
      android:text="@string/time_pick"
      android:textAppearance="?android:attr/textAppearanceMedium" />

   <Button
      android:id="@+id/set_button"
      android:layout_width="wrap_content"
      android:layout_height="wrap_content"
      android:layout_alignParentBottom="true"
      android:layout_centerHorizontal="true"
      android:layout_marginBottom="180dp"
      android:onClick="setTime"
      android:text="@string/time_save" />

   <TimePicker
      android:id="@+id/timePicker1"
      android:layout_width="wrap_content"
      android:layout_height="wrap_content"
      android:layout_above="@+id/set_button"
      android:layout_centerHorizontal="true"
      android:layout_marginBottom="24dp" />

   <TextView
      android:id="@+id/textView3"
      android:layout_width="wrap_content"
      android:layout_height="wrap_content"
      android:layout_alignLeft="@+id/timePicker1"
      android:layout_alignTop="@+id/set_button"
      android:layout_marginTop="67dp"
      android:text="@string/time_current"
      android:textAppearance="?android:attr/textAppearanceMedium" />

   <TextView
      android:id="@+id/textView1"
      android:layout_width="wrap_content"
      android:layout_height="wrap_content"
      android:layout_below="@+id/textView3"
      android:layout_centerHorizontal="true"
      android:layout_marginTop="50dp"
      android:text="@string/time_selected"
      android:textAppearance="?android:attr/textAppearanceMedium" />

</RelativeLayout>
Following is the content of the res/values/string.xml.
<?xml version="1.0" encoding="utf-8"?>
<resources>
<string name="app_name">TimePicker</string>
   <string name="action_settings">Settings</string>
   <string name="time_picker_example">Time Picker Example</string>
   <string name="time_pick">Pick the time and press save button</string>
   <string name="time_save">Save</string>
   <string name="time_selected"></string>
   <string name="time_current">The Time is:</string>
</resources>
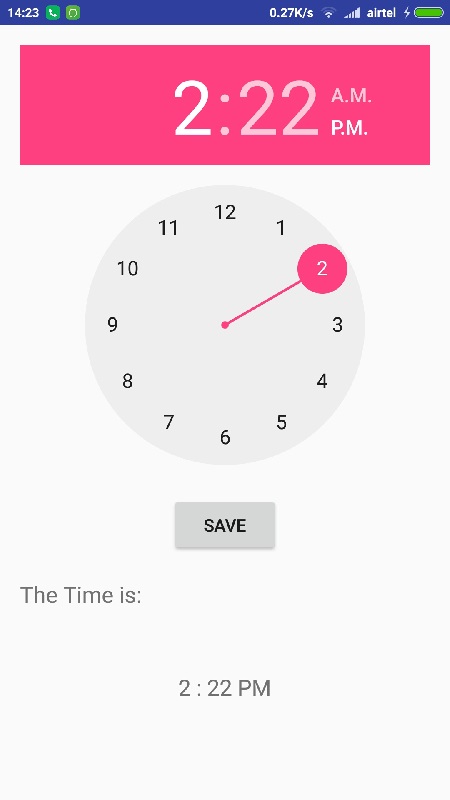
Let's try to run our TimePicker application we just modified. I assume you had created your AVD while doing environment setup. To run the app from Android studio, open one of your project's activity files and click Run  icon from the toolbar. Android Studio installs the app on your AVD and starts it and if everything is fine with your setup and application, it will display following Emulator window −
icon from the toolbar. Android Studio installs the app on your AVD and starts it and if everything is fine with your setup and application, it will display following Emulator window −
Now you can see that the time has already been set of the TimePicker widget. And the current time is also showing at the bottom label. Now we will change the time and press the save button.
As you can see in the above image, that the time has been updated after pressing the save button.
Android Date Picker allows you to select the date consisting of day, month and year in your custom user interface. For this functionality android provides DatePicker and DatePickerDialog components.
In this tutorial, we are going to demonstrate the use of Date Picker through DatePickerDialog. DatePickerDialog is a simple dialog containing DatePicker.
In order to show DatePickerDialog , you have to pass the DatePickerDialog id toshowDialog(id_of_dialog) method. Its syntax is given below −
showDialog(999);
On calling this showDialog method, another method called onCreateDialog gets automatically called. So we have to override that method too. Its syntax is given below −
@Override
protected Dialog onCreateDialog(int id) {
   // TODO Auto-generated method stub
   if (id == 999) {
      return new DatePickerDialog(this, myDateListener, year, month, day);
   }
   return null;
}
In the last step, you have to register the DatePickerDialog listener and override its onDateSet method. This onDateSet method contains the updated day, month and year. Its syntax is given below −
private DatePickerDialog.OnDateSetListener myDateListener = new DatePickerDialog.OnDateSetListener() {
   @Override
   public void onDateSet(DatePicker arg0, int arg1, int arg2, int arg3) {
      // arg1 = year
      // arg2 = month
      // arg3 = day
   }
};
Apart form date attributes, DatePicker object is also passed into this function. You can use the following methods of the DatePicker to perform further operation.
| Sr.No | Method & description |
|---|---|
| 1 | getDayOfMonth()
This method gets the selected day of month
|
| 2 | getMonth()
This method gets the selected month
|
| 3 | getYear()
This method gets the selected year
|
| 4 | setMaxDate(long maxDate)
This method sets the maximal date supported by this DatePicker in milliseconds since January 1, 1970 00:00:00 in getDefault() time zone
|
| 5 | setMinDate(long minDate)
This method sets the minimal date supported by this NumberPicker in milliseconds since January 1, 1970 00:00:00 in getDefault() time zone
|
| 6 | setSpinnersShown(boolean shown)
This method sets whether the spinners are shown
|
| 7 | updateDate(int year, int month, int dayOfMonth)
This method updates the current date
|
| 8 | getCalendarView()
This method returns calendar view
|
| 9 | getFirstDayOfWeek() |
Example
Here is an example demonstrating the use of DatePickerDialog class. It creates a basic Date Picker application that allows you to set the Date using DatePicker Widget
To experiment with this example , you can run this on an actual device or in an emulator.
| Steps | Description |
|---|---|
| 1 | You will use Eclipse IDE to create an Android application and name it as DatePicker under a package com.example.datepicker. While creating this project, make sure you Target SDK and Compile With at the latest version of Android SDK to use higher levels of APIs. |
| 2 | Modify src/MainActivity.java file to add necessary code. |
| 3 | Modify the res/layout/activity_main to add respective XML components. |
| 4 | Modify the res/values/string.xml to add necessary string components. |
| 5 | Run the application and choose a running android device and install the application on it and verify the results. |
Following is the content of the modified main activity filesrc/com.example.datepicker/MainActivity.java.
package com.example.datepicker;
import java.util.Calendar;
import android.app.Activity;
import android.app.DatePickerDialog;
import android.app.Dialog;
import android.os.Bundle;
import android.view.Menu;
import android.view.View;
import android.widget.DatePicker;
import android.widget.TextView;
import android.widget.Toast;

public class MainActivity extends Activity {

   private DatePicker datePicker;
   private Calendar calendar;
   private TextView dateView;
   private int year, month, day;

   @Override
   protected void onCreate(Bundle savedInstanceState) {
      super.onCreate(savedInstanceState);
      setContentView(R.layout.activity_main);

      dateView = (TextView) findViewById(R.id.textView3);
      calendar = Calendar.getInstance();
      year = calendar.get(Calendar.YEAR);

      month = calendar.get(Calendar.MONTH);
      day = calendar.get(Calendar.DAY_OF_MONTH);
      showDate(year, month+1, day);
   }

   @SuppressWarnings("deprecation")
   public void setDate(View view) {
      showDialog(999); // 就會呼叫有實做的Dialog.... onCreateDialog
      Toast.makeText(getApplicationContext(), "ca", Toast.LENGTH_SHORT)
      .show();
   }

   @Override
   protected Dialog onCreateDialog(int id) {
      // TODO Auto-generated method stub
      if (id == 999) {
         return new DatePickerDialog(this, myDateListener, year, month, day);
      }
      return null;
   }

   private DatePickerDialog.OnDateSetListener myDateListener = new DatePickerDialog.OnDateSetListener() {
      @Override
      public void onDateSet(DatePicker arg0, int arg1, int arg2, int arg3) {
         // TODO Auto-generated method stub
         // arg1 = year
         // arg2 = month
         // arg3 = day
         showDate(arg1, arg2+1, arg3);
      }
   };

   private void showDate(int year, int month, int day) {
      dateView.setText(new StringBuilder().append(day).append("/")
      .append(month).append("/").append(year));
   }

   @Override
   public boolean onCreateOptionsMenu(Menu menu) {
      // Inflate the menu; this adds items to the action bar if it is present.
      getMenuInflater().inflate(R.menu.main, menu);
      return true;
   }
}
Following is the modified content of the xml res/layout/activity_main.xml.
<RelativeLayout xmlns:android="http://schemas.android.com/apk/res/android"
   xmlns:tools="http://schemas.android.com/tools"
   android:layout_width="match_parent"
   android:layout_height="match_parent"
   android:paddingBottom="@dimen/activity_vertical_margin"
   android:paddingLeft="@dimen/activity_horizontal_margin"
   android:paddingRight="@dimen/activity_horizontal_margin"
   android:paddingTop="@dimen/activity_vertical_margin"
   tools:context=".MainActivity" >

   <Button
      android:id="@+id/button1"
      android:layout_width="wrap_content"
      android:layout_height="wrap_content"
      android:layout_alignParentTop="true"
      android:layout_centerHorizontal="true"
      android:layout_marginTop="70dp"
      android:onClick="setDate"
      android:text="@string/date_button_set" />

   <TextView
      android:id="@+id/textView1"
      android:layout_width="wrap_content"
      android:layout_height="wrap_content"
      android:layout_alignParentTop="true"
      android:layout_centerHorizontal="true"
      android:layout_marginTop="24dp"
      android:text="@string/date_label_set"
      android:textAppearance="?android:attr/textAppearanceMedium" />

   <TextView
      android:id="@+id/textView2"
      android:layout_width="wrap_content"
      android:layout_height="wrap_content"
      android:layout_below="@+id/button1"
      android:layout_marginTop="66dp"
      android:layout_toLeftOf="@+id/button1"
      android:text="@string/date_view_set"
      android:textAppearance="?android:attr/textAppearanceMedium" />

   <TextView
      android:id="@+id/textView3"
      android:layout_width="wrap_content"
      android:layout_height="wrap_content"
      android:layout_alignRight="@+id/button1"
      android:layout_below="@+id/textView2"
      android:layout_marginTop="72dp"
      android:text="@string/date_selected"
      android:textAppearance="?android:attr/textAppearanceMedium" />

</RelativeLayout>
Following is the content of the res/values/string.xml.
<?xml version="1.0" encoding="utf-8"?>
<resources>
   <string name="app_name">DatePicker</string>
   <string name="action_settings">Settings</string>
   <string name="hello_world">Hello world!</string>
   <string name="date_label_set">Press the button to set the date</string>
   <string name="date_button_set">Set Date</string>
   <string name="date_view_set">The Date is: </string>
   <string name="date_selected"></string>
</resources>
Let's try to run our DatePicker application we just modified. I assume you had created your AVD while doing environment set-up. To run the app from Eclipse, open one of your project's activity files and click Run icon from the tool bar. Eclipse installs the app on your AVD and starts it and if everything is fine with your set-up and application, it will display following Emulator window −
icon from the tool bar. Eclipse installs the app on your AVD and starts it and if everything is fine with your set-up and application, it will display following Emulator window −
沒有留言:
張貼留言